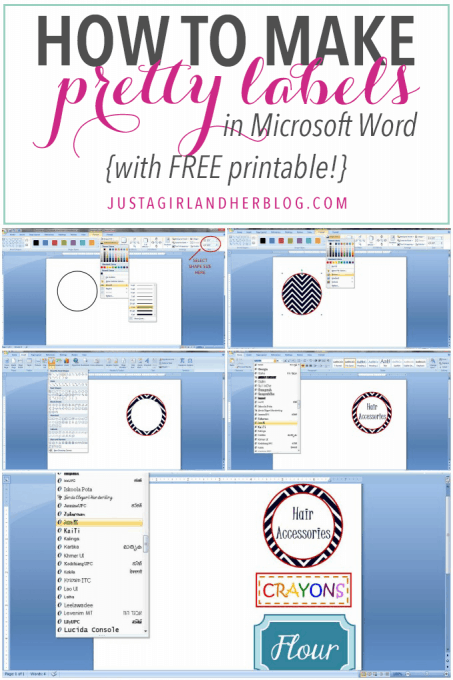
Make America Great Again Cap Clipart
This post contains affiliate links. For more information, see my disclosures here.

Get 300+ pages of free printables!
Become one of our VIP newsletter subscribers and gain access to our exclusive free printables vault!
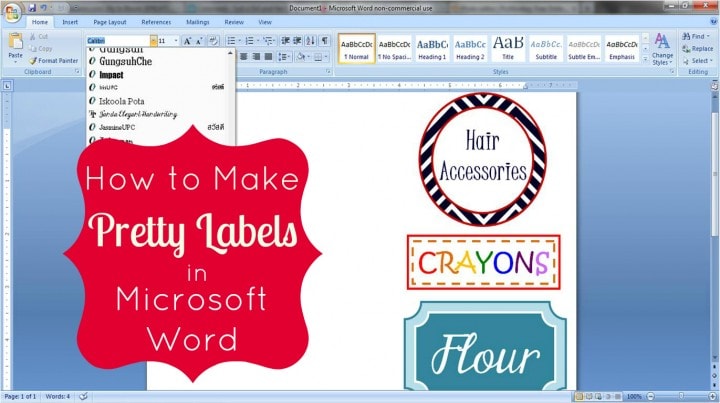
I must admit, I am just a teensy bit obsessed with labels. I put them on just about everything in our house. They're perfect for getting organized, helping the Cs find what they need, and adding a pretty touch to a basket or gift. If I'm making labels with adhesive vinyl, I typically use my Silhouette cutting machine.
When it comes to creating pretty paper labels, though, I can't help but head back to my old stand by, Microsoft Word, for all of my label-making needs. Word is great because it's super-simple to use, and almost everybody has it, so it's really easy to email and share projects. I'm sure there are about a million ways to create pretty labels in Microsoft Word, but here is my tried-and-true method:
UPDATE! If you'd rather see a video version of this tutorial, click here! 🙂
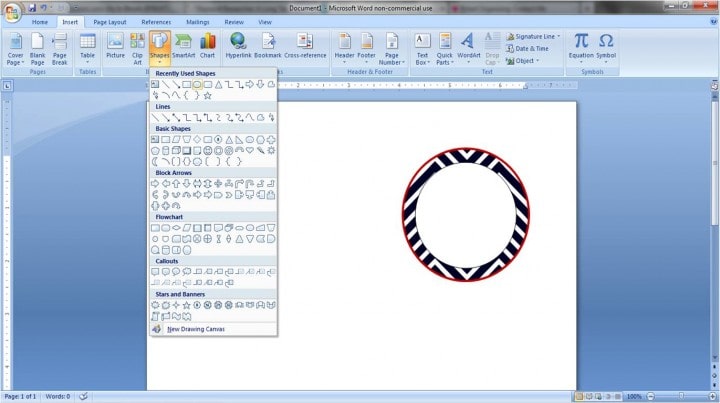
1. Choose your shape.
Beginning with a blank document, click on the "Insert" tab, select "Shapes," and choose the desired shape for your label. I picked the circle.

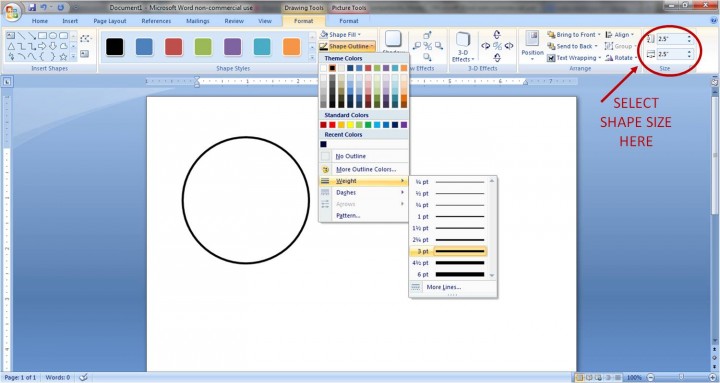
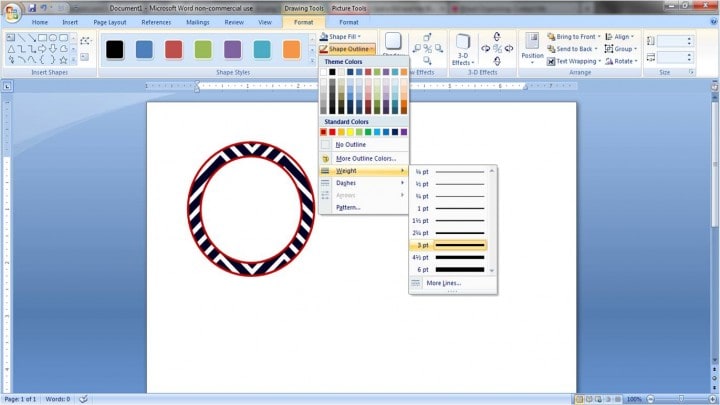
2. Adjust your outline and fill settings.
Once you've drawn your shape to your desired size {I chose 2.5″ x 2.5″.}, you'll want to make it look pretty! I usually like to make the outline of my shape a little thicker so that it is well defined when I print it out. To do that, go to the "Format" tab, and under the "Shape Outline" drop down, you will see "Weight." I chose 3 pt; you can make yours thinner or thicker depending on your preference.
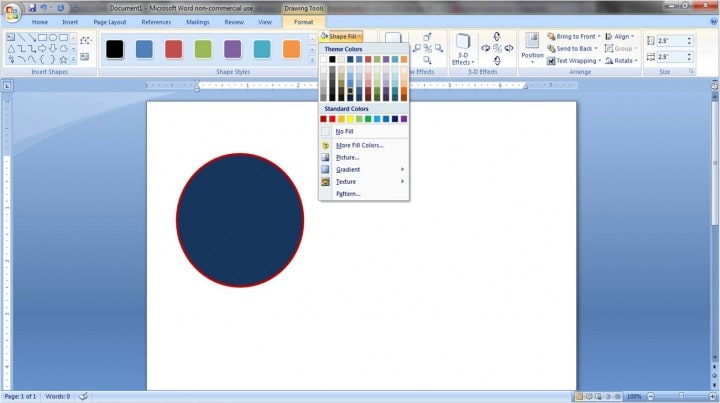
You can also change the color of your outline in the "Shape Outline" drop down. {I picked dark red.} While we're changing colors, let's go ahead and change our fill color as well. Right above "Shape Outline," you'll see the "Shape Fill" option. You have a few choices here. You can fill your shape with a solid color.
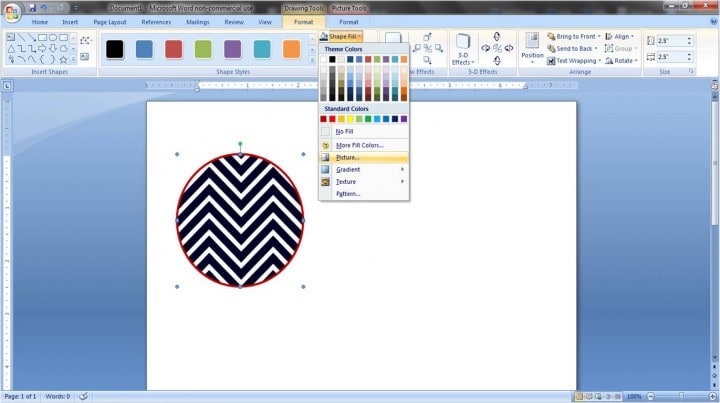
Or you may want to put a design inside your shape. By choosing the "Picture" option from the "Shape Fill" drop down, you can use any picture file on your computer as your shape's background.
You can also play with the "Gradient" and "Texture" options until you find the background of your choice.
3. Add a layer, if desired.
I think it always looks nice to add a second layer to your label. You get to have a fun color or pattern in the background, but you also get a clean white surface for your wording. To add a layer, you'll go through a similar process: choose your shape {"Insert" tab, "Shapes" button}, and size it correctly {I did 2″ x 2″.}…
Then adjust your outline width and outline and fill colors. I went with the 3 pt dark red outline again, and I chose to keep the fill color white, but you could always pick a color.
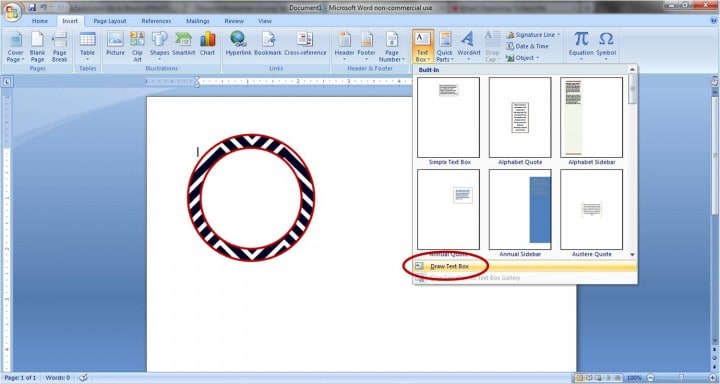
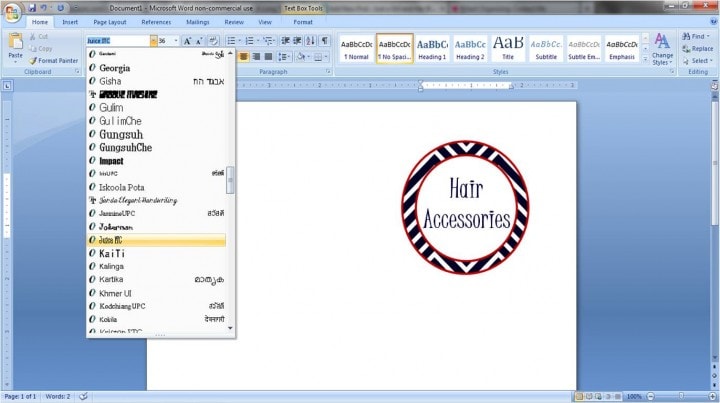
4. Add your text.
To do this, you'll want to go to the "Insert" tab and select "Text Box." Choose the "Draw Text Box" option at the bottom of the drop down menu.
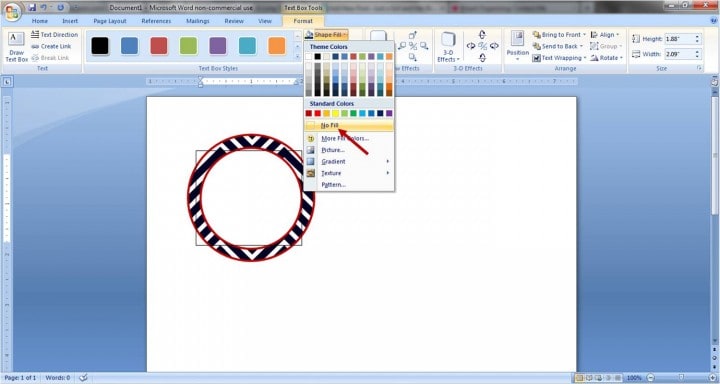
Draw your text box over your existing shape. Then, so the text box doesn't block the beautiful label you've made, you'll want to make it transparent. With the text box selected, go to the "Text Box" tab, and under "Shape Fill" choose "No Fill." You will also want to choose "No Fill" for the "Shape Outline."
Once your text box is transparent, you're ready to type. Add your words, and change the size, font, and alignment like you would in a regular Word document. You can also play with color! I used a 36 pt font called "Juice ITC" in dark blue.
5. "Group" your label.
The last thing I like to do when I get the label the way I want it is to group it together. This allows me to move it around the page as one unit rather than trying to move each piece individually. To use the group feature, hold down the "Ctrl" key and click on each element of your label so they are all selected. {This can get a little tricky. You'll know your cursor is in the right place to click when it becomes an arrow with a plus sign.}

Next you'll want to right click on your selection and under "Grouping" choose "Group."
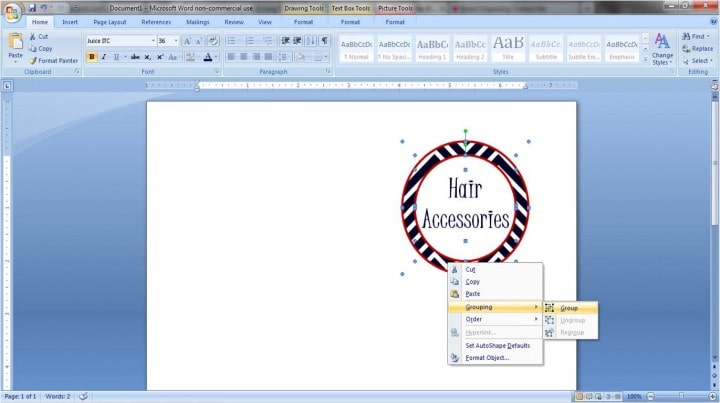
TA-DA! Your label is now one cohesive unit! You can move it around the page, copy and paste it, change the text, go crazy with it!
Now for all you overachievers out there…
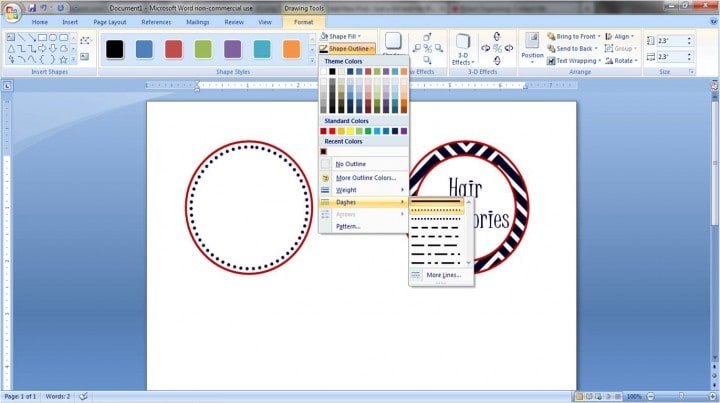
The Bonus Round
Another fun thing to play with is the outline style. I'll start out with the same white circle with a dark red outline, but instead of using a colored background, I'll add interest with the second layer.
For the "Shape Outline" of the inner circle, go down to "Dashes." You will be able to choose dots {as I did}, squares, dashed lines, etc. Just another cute dimension to add to your labels!
Though fancy programs and machines can be really great, it is possible to make pretty labels just using Microsoft Word. In my opinion, it is the simplest program to navigate, and it still gives beautiful, fully-custom results.
Printing Your Labels
After you've created your cute labels, what's next? I typically print mine out (with my home ink jet printer) on white card stock so that they're sturdy and cut them out by hand. If they're going to be in a higher traffic area, I'll laminate them to protect them a little bit more. Laminated or not, I typically just attach my labels with tape or velcro dots.
If you want to use a label that is more like a sticker, Avery has many templates for their stickers. You would simply head to their website, find the template that matches the stickers that you purchased (you can search by the number on the pack), download the template, and create your design within the guides they provide.
My Favorite Labeling Supplies
Looking for some of the supplies I've mentioned above? You can find them here:
- Printer
- White Card Stock
- Laminator
- Laminating Pouches
- Velcro Dots
- Sticker Sheets
And just for fun, I've included a page of simple printable labels to get you started. Happy labeling!

{Simple Printable Labels}
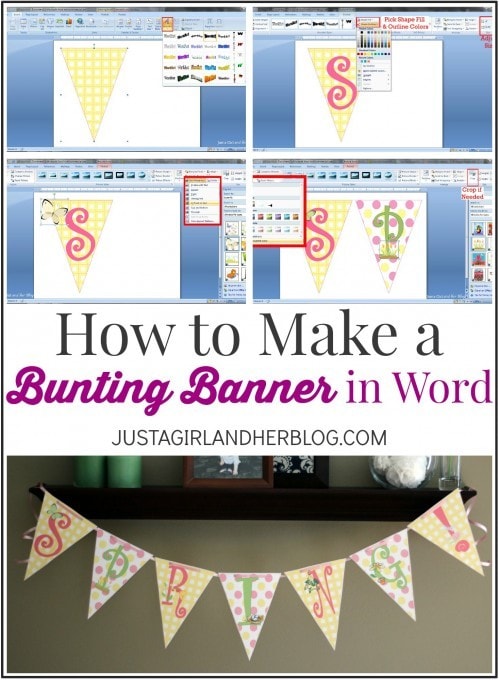
Think this post was helpful? Check out How to Create a Bunting Banner in Word {with Clip Art Tips and Tricks}
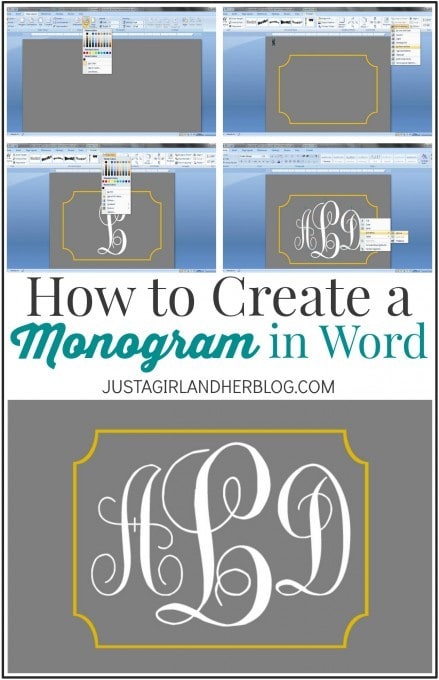
How to Create a Monogram in Word
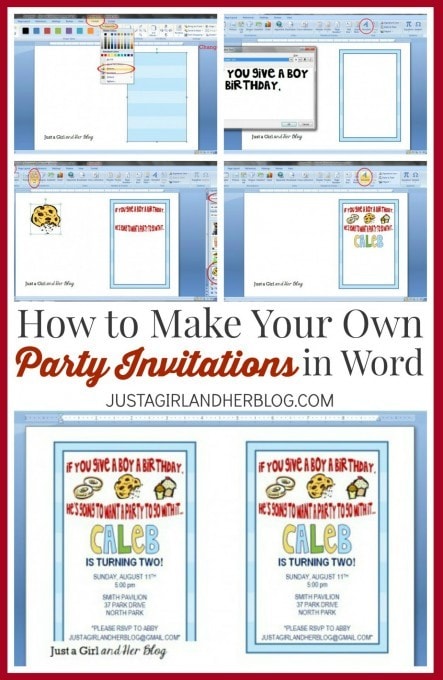
and How to Create Your Own Party Invitations in Word
[Psssttt… Organize every room of your house with our 100 best home organization tips!]
What is your favorite way to make labels?
This post contains affiliate links. For more information, see my disclosures here.
Source: https://justagirlandherblog.com/make-labels-in-microsoft-word/
0 Response to "Make America Great Again Cap Clipart"
Post a Comment